As I update the blog site, I will insert various reviews, opinions, and tests of the gear and equipment that I use.
The first gear review I will do is regarding the Warbonnet Blackbird hammock.
Warbonnet Blackbird Review original done 03/11/2011
Customer Service - On Feb.11, 2011, I ordered a Warbonnet Blackbird 1.7 Double Layer Hammock (olive green) from Warbonnet Outdoors, LLC, in Colorado. (warbonnetoutdoors.com) The Warbonnet products are mostly made by hand by Warbonnetguy (Brandon). Any products that are manufactured out of the country are specifically identified on his website. I had a little email communication with Brandon during the days after I placed my order and the communication was prompt and on point.
The only other camping hammock I have tried is a Hennessy Hammocks Back Packer Ultra Light. That product is a different design, but since it is the only comparison I can make that is what I will do. I know it’s not apples to apples, but it is the best I can do. Both products have an integral ridge line and attached bugnet. The HH has a bottom entry while the WBBB has a zipper along the entire left side with two opposing zips. Both are designed for an asymetrical lay which means you lay with your head to the left of center and your feet to the right of center. This asymetrical lay provides a flatter lay than the "banana" lay when you are right down the middle.
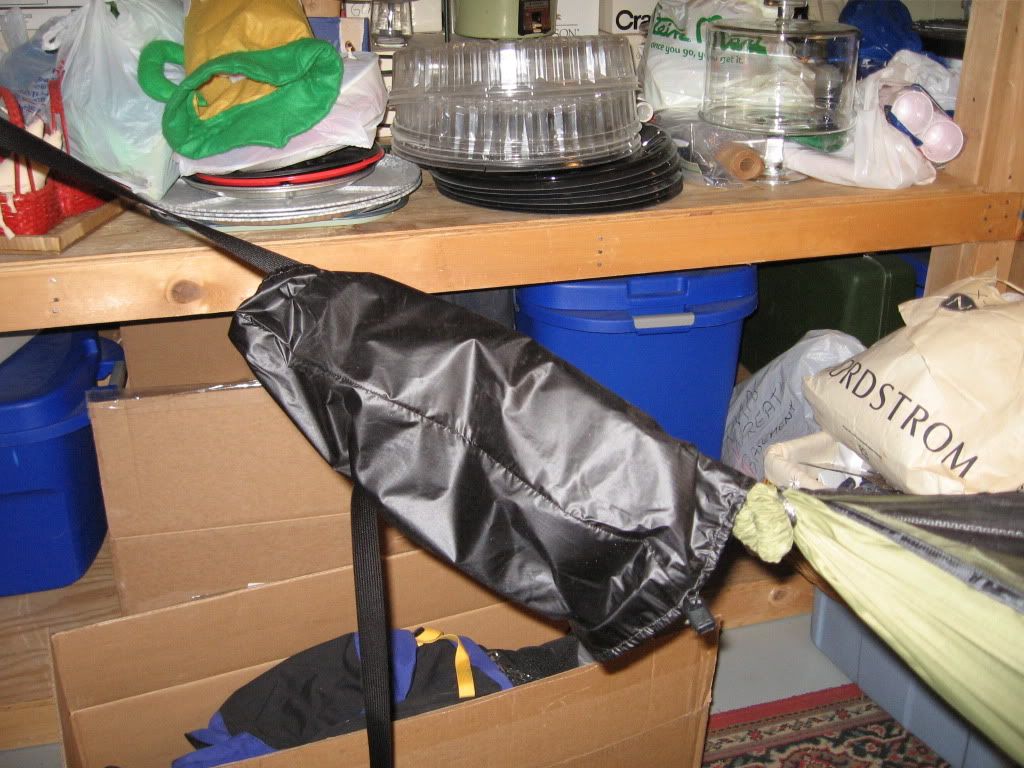
February 25, 2011 – My WBBB arrived about noon. The dimensions and statistics, e.g. Ridge Line length, hammock length and width, weight, etc., all matched the stated numbers on the website, with the exception that the hammock was about 2 oz lighter than listed. I guess this might be due to the new, smaller buckles in the suspension. The hammock was plenty big in all the dimensions. I am not a gram weenie, my main camping is canoe camping, so a few ounces here and there make little difference to me. As everyone else who has looked at one of these products I must say the quality is evident. A close inspection demonstrates care and attention to detail in the manufacture, e.g. no loose threads, no crooked seams, etc. The hammock comes in a double ended stuff sack called a Black Bishop bag. It is about 12x7x7, but can compact down smaller. The stuff sack remains on the suspension so you can set up and tear down without the hammock touching the ground. It sets up and tears down in about 2 minutes.
The only other camping hammock I have tried is a Hennessy Hammocks Back Packer Ultra Light. That product is a different design, but since it is the only comparison I can make that is what I will do. I know it’s not apples to apples, but it is the best I can do. Both products have an integral ridge line and attached bugnet. The HH has a bottom entry while the WBBB has a zipper along the entire left side with two opposing zips. Both are designed for an asymetrical lay which means you lay with your head to the left of center and your feet to the right of center. This asymetrical lay provides a flatter lay than the "banana" lay when you are right down the middle.
February 25, 2011 – My WBBB arrived about noon. The dimensions and statistics, e.g. Ridge Line length, hammock length and width, weight, etc., all matched the stated numbers on the website, with the exception that the hammock was about 2 oz lighter than listed. I guess this might be due to the new, smaller buckles in the suspension. The hammock was plenty big in all the dimensions. I am not a gram weenie, my main camping is canoe camping, so a few ounces here and there make little difference to me. As everyone else who has looked at one of these products I must say the quality is evident. A close inspection demonstrates care and attention to detail in the manufacture, e.g. no loose threads, no crooked seams, etc. The hammock comes in a double ended stuff sack called a Black Bishop bag. It is about 12x7x7, but can compact down smaller. The stuff sack remains on the suspension so you can set up and tear down without the hammock touching the ground. It sets up and tears down in about 2 minutes.
Hung it in the basement with ends at equal height, and did a quick test. There are 2 small triangular buckles on the adjustable webbing suspension. This is a change from the buckles shown on the website video. Printed instructions indicate the change is to make the suspension slip free and that the half hitch is no longer needed behind the buckles when hanging. I tried it cautiously without the safety knot. OK. No slippage observed.

Initially, this seems to lie flatter than my HHBP UL. There is a lot of room in the hammock. You can put the soles of your feet together, pull them up, and let your knees flop out to either side. When I did this, the tension in the middle raised my butt up and it felt almost completely flat from my neck all the way down. There are tie outs on each side. They are adjustable and the shock cord is on a sliding loop so it automatically adjusts to keep tension equal on each tie out point.


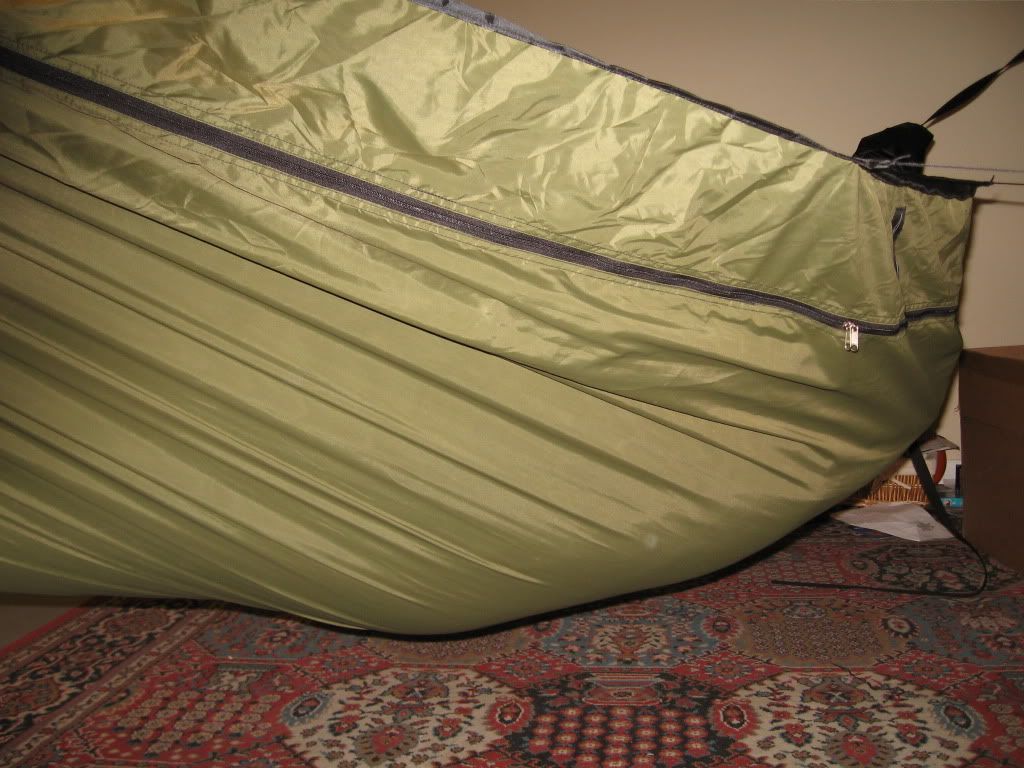
The gear shelf on the left side is larger than I thought it would be.
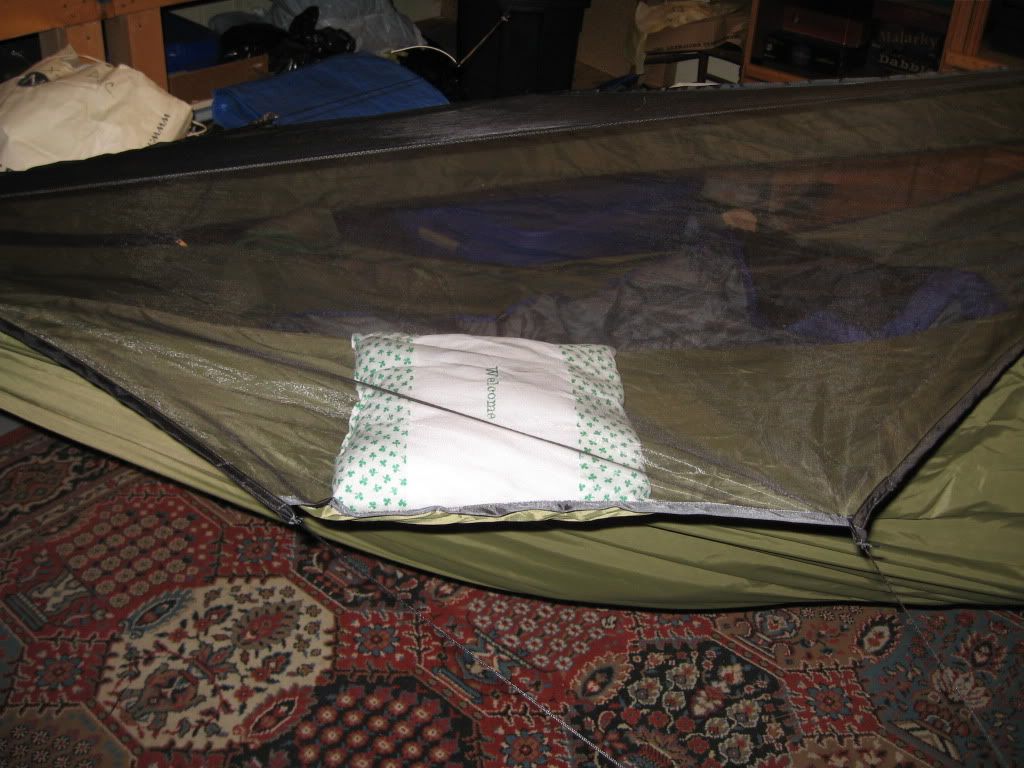 |
| Pillow is 10"x9" |
 |
| Footbox is outlined by black grossgrain at right side of photo; Note: Tie-out is white shock cord |
Back Sleeping - I did notice that my knees tend to hyperextend a bit, but that is to be expected in a gathered end hammock. I also noticed that there was pressure on the outside of my left calf, just below the knee. This comes from the taught area between the foot end and the area where the foot box begins. With a slight adjustment in my diagonal lay, I could bring both legs inside that tension ridge. This is the legendary "sweet spot" that many hammock campers talk about. Believe me, when you hit it, you know it.
Side Sleeping - I could sleep on my side, especially in the fetal position. When in the fetal position, on my side, I was completely flat. I mean, flat like in a bed. The little pillow was very comfortable to use while on my side.
February 26, 2011 – I slept fully inside the sleeping bag all night. On Saturday night I added a 20" blue ccf pad inside the folded poncho liner. This made a dramatic difference in warmth. It was actually too hot with my sleeping bag zipped up. I had to open the bag and let it vent. Needless to say, I was warm and toasty and fell asleep very quickly. With so much fabric between me and the ccf I had no condensation or sweat at all. I also had no creases/folds occur in the ccf the whole night. It was a very comfortable lay. As is often stated, a standard 20" ccf pad is really too small for proper use in a hammock. It doesn’t give the complete wrap around coverage that one wants for the shoulders and torso. When I got up in the middle of the night for a little relief (hey, I’m a 53 yr old coot and my prostate tells me that every night!) the pad slipped a bit. When I got back in I noticed some chill under my left shoulder. I got out through the zippered side and with about 2 seconds of adjustment, I was back on a warm, toasty hammock. Side sleeping was even better with the slight bit of added rigidity from the ccf.
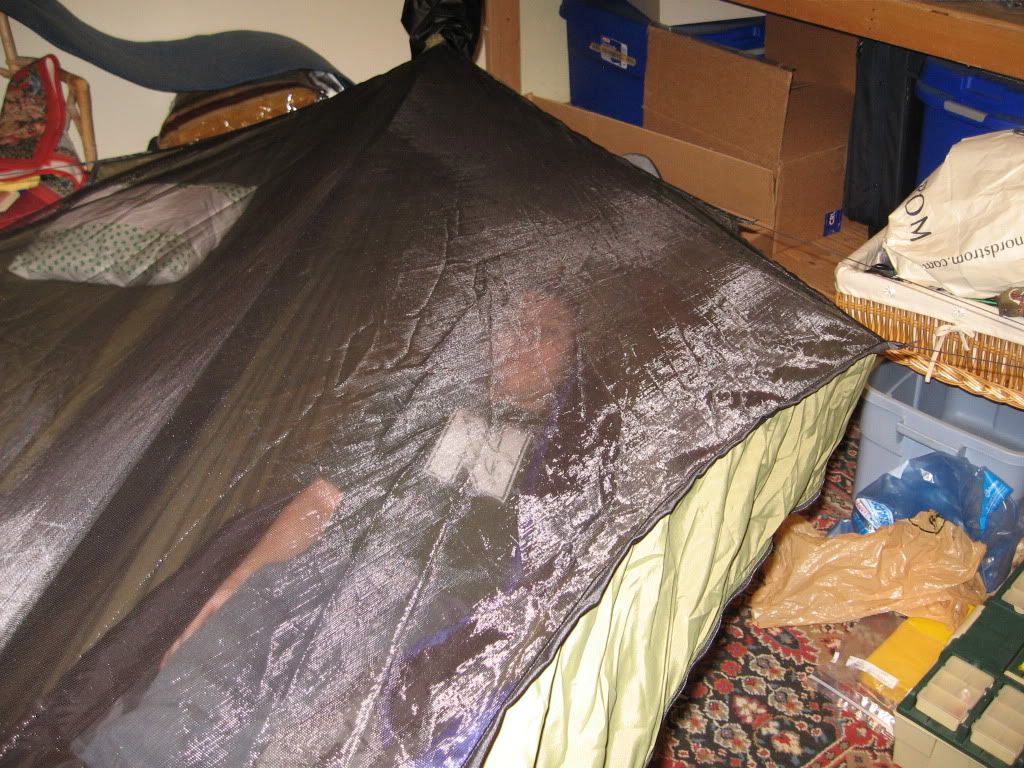
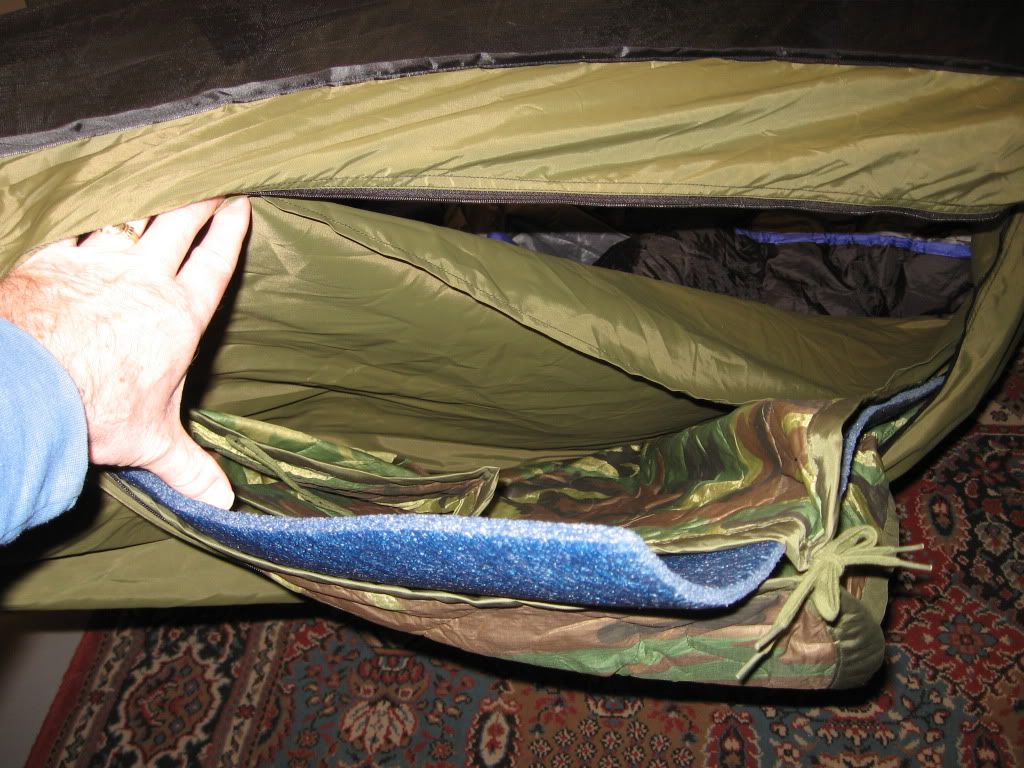 |
| Blue CCF pad wrapped in pocho liner and inserted between the layers of the hammock |
 |
| Zipper is shown here. |
I have a KAQ Potomac under quilt and will be testing it with this hammock in the weeks to come. I also am going to get a wide ccf pad will update this review then. .....
04/17/2011OK. I'm back with some more impressions. Over the past month I have slept in the WBBB 5 nights using a KAQ Potomac under quilt. It took several tries to get the uq snug enough so that I didn't have a cold spot under my butt. The WBBB does not have the side loops placed the same as the Hennessy, so you cannot just snug up the center of each side to the hammock edge. The whole uq must be snugged up. I pulled the side shock cords very tight and cinched the ends to make a nice tight cocoon. It turned out it was too tight so I have been loosening it each night and last night I finally found the proper tension. Warm and toasty!
Without the ccf pad underneath, the hammock really wraps around me and is very comfortable. Again, I have left hip and lower back issues and I was worried about the "banana" lay. Boy, was I wrong! You really do get a sort of feeling that you are floating as you sleep. I have had some very comfortable side laying as well. There is a lot of room for the hammock to expand and when I lay on my side and curl up my knees, the hammock opens up wide and I lay very flat right in the center.
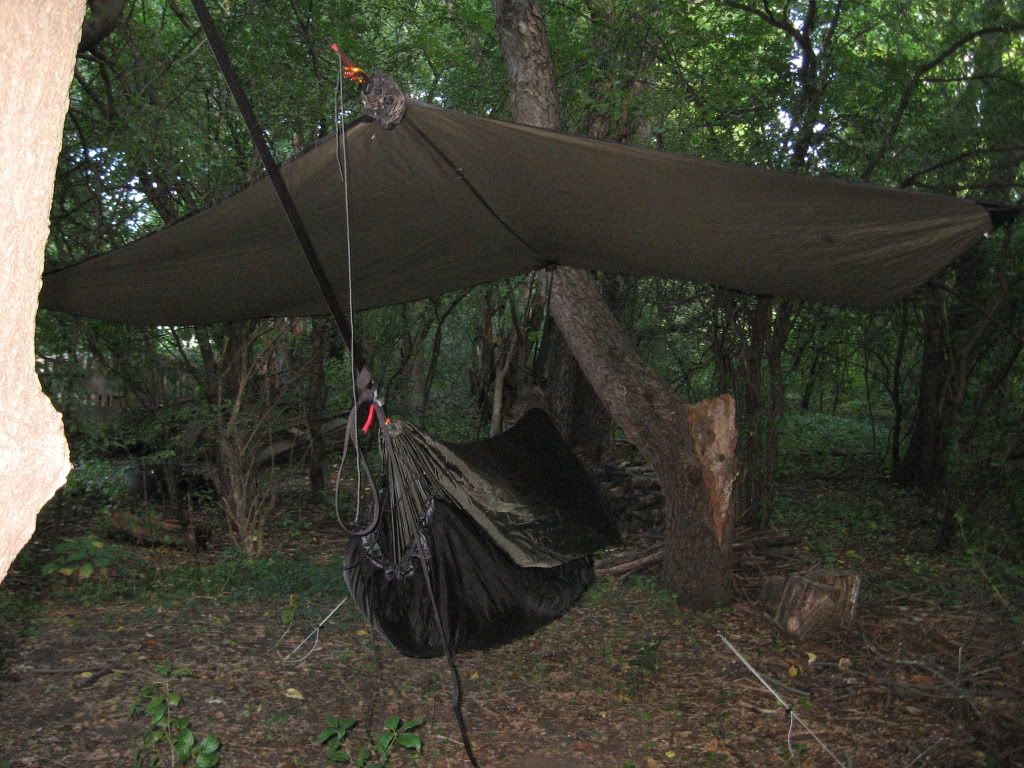
 |
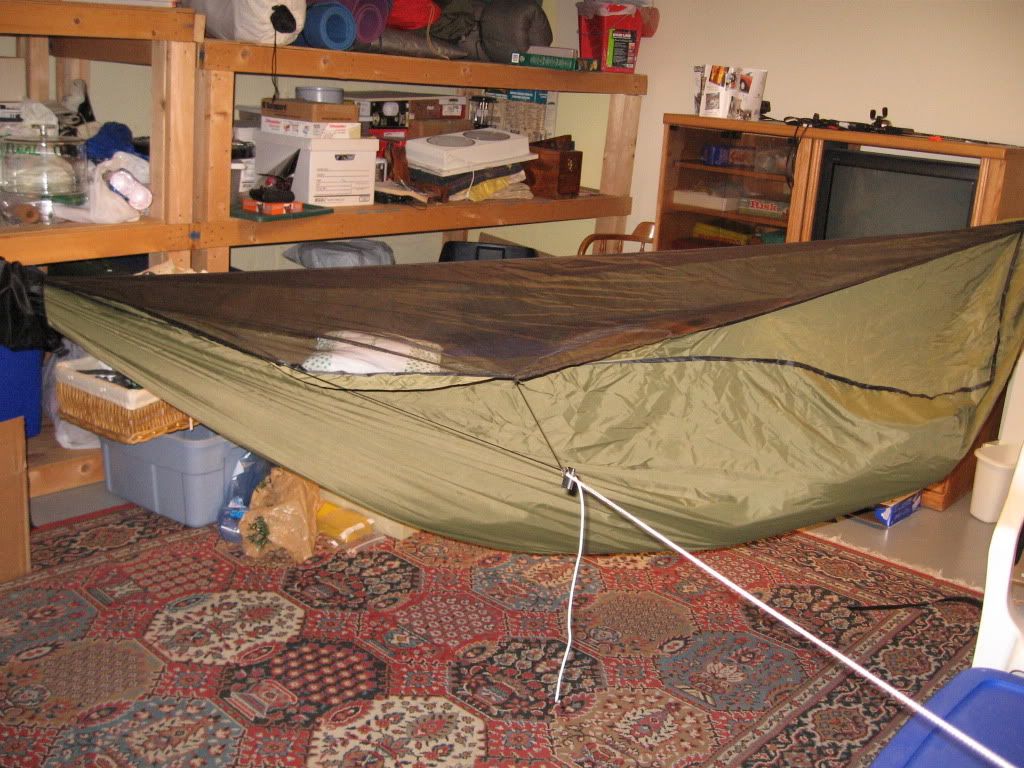
| My son lying in the hammock. Tieouts spread the hammock. Ridge line keeps bug net up off your face. |
As for the hang of the hammock I have been playing around with that also. I raised the foot end about 4-5 inches higher than the head. That made my lie flatter and I did not slip into the footbox. There is a lot of room in the footbox and my sleeping bag footbox fits very nicely. I am using a mummy bag with the zipper open as a top quilt.
For the first couple nights I was experiencing significant pressure on the outside of my left calf. There is a ridge of tight material that runs from about my knee to the end of the hammock. I raised the foot end another 2 inches or so and the let out about 3 inches of strapping at each end. That adjustment changed how tightly the whole hammock was hanging making the ridge line significantly looser. The suspension now hangs at about 30 deg. at the head end and almost 45 deg. at the foot end. There was a marked improvement in the flatness of my lay and the ridge causing the calf pressure is almost completely gone. As mentioned earlier, my basement hanging area is not optimal because it is really too short for much proper adjustment. Once I can hang outdoors (we have had a lot of rain here on the weekends) I expect I'll be able to fiddle with the angle on the suspension and get an even better lay. I went ahead and bought a Guide Gear 12x12 tarp. That tarp will be matched with the WBBB and I can tell there will be lots of room when it is pitched.
More to come after a few outdoor hangs……………
Question from a Reader: Can I ask why you went with the 1.7 OZ double layer? The website says the 1.7 oz single and some of the lighter weight doubles are suitable for 175#. We are about the same size, and I'm planning to order one. So wanted to see if there was a reason you went a little sturdier.
Answer - I lead groups at least every other year. I expect that I will have to lend my gear to others, so I went with the heavy duty model. My first hammock was a Hennessy Backpacker UL. It is rated for 200lbs. I expect it could handle some of my friends and family who are in the 225-235 range, but since I was getting a WBBB anyway, I thought it best to go up in weight class. I do almost no backpacking anymore, [Edit: This is changing, of course] and almost all canoe camping, so the extra weight is not really an issue. I did want the Double layer for skeeter protection and so I could use a ccf pad. Having the ccf pad is a belt and suspenders thing. If I have to go to ground, I know I'll be OK on underside insulation.
Question from a Reader: You have been using it with an uq, I plan to start out with my existing ridge rest pad or go to Wally world and get a $6.00 CCF pad. Planning to use the existing sleeping bag as a top quilt.
See any reason this will not work? Definitely not a cold weather setup, but I've got a canvas tent and stove for those seasons (almost done anyway).
Answer - Your get up will work just fine. If you can get a wider ccf pad that helps, especially with the shoulder area. I used a wallyworld 20" blue pad for one night and it kept me nice and warm in my 60 degree basement. I did wrap the ccf in an army surplus poncho liner so that I did not have any condensation issues. I get sweaty when I lay on the ccf with just a layer of nylon twixt me and the foam.
05/08/11
WBBB Update
FINALLY, I got a chance to hang outside last night in the WBBB. Weather: Low Temp: 43F Rain: 0 Wind: Steady dropping to none
Clothing: Fleece hat; Duofold long sleeve T and long johns (60%wool); Pull over sweatshirt and regular sweatpants; Wigwam winter weight wool socks
The rig from bottom to top:
KAQ Potomac UQ
wallyworld CCF in the pad sleeve of the hammock
WBBB DL 1.7
20 degree synthetic sleeping bag – mummy style
Guide Gear 12 x 12 tarp modified for rectangular hang
I set up, around 6pm, the wind was moving pretty steady so I made some soft shackle prussic loops out of 7/64 amsteel and used those to tie out the tarp panel pulls on one side. I really like the adjustability of the prussic and I am going to make some more so I can trim out all connection points of my tarp in the future. I used some 1/8 nylon rope for a continuous ridgeline. The rope is pretty stretchy, but since it is only for the tarp RL it was OK. I think I’ll probably skip the complete RL next time and just use prussic loops to trim out each end. I’ll use a heavier rope around the trees so the amsteel prussic can grab well. The amsteel prussics don’t really hold too well to the amsteel. It’s too slippery.
Setting up took a while as I was playing with the whole set-up for the first time. It took about 15 minutes to get the hammock hanging with the right angle on the suspension. I tried a few different trees before finding the right combo. Once I got the angle of the suspension into the good range, it was very comfortable. The ridge of tight fabric under the left thigh was almost non-existent. That made the sweet spot a little larger than I have had in the indoor hangs. It also made it much easier to sleep on my side when I wanted. I need to remember to put something under my knees for that last bit of comfort. I forgot last night and had some hyperextension of my knees. Not too much of a problem since I just crossed my ankles and that put a little bend in the knees. The footbox of the WBBB really makes a difference in that my feet could lie naturally without any pressure bending them upward.
When I first went to bed around 11pm I was too hot with the hat and clothing and using the bag as quilt, but I left everything on knowing that it would get cooler as the night went on. It was about 47F at bedtime. Stayed warm and toasty until about 4:30 a.m. when I got up at nature’s call. When I got back in I was cool on the underside, but it didn’t keep me awake. At 5a.m. the birds and ducks got my day under way. I just can’t sleep through all that chirping and quacking!!
Since my buddy wanted to use a hammock, I lent him the 1.7 and I bought a 1.1 dbl. Of course, now that I have 2 hammocks, I just gotta get another UQ. :)
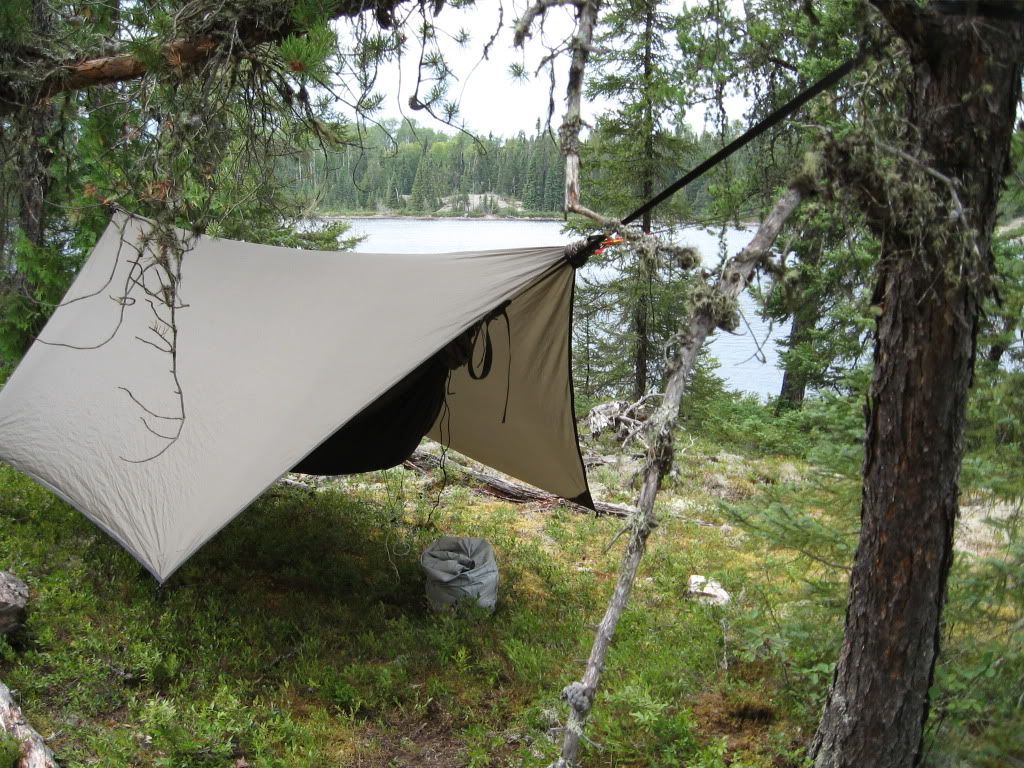
 |
| WBBB with KAQ underquilt(black) and Hennessy Hex tarp |
08/30/11
Well, I used my new Warbonnet Blackbird 1.1 double layer in Wabakimi this month. The most comfortable sleep I have ever had in the wilderness, BY FAR! The 1.1 stretches more than the 1.7 and is lighter and airier than the 1.7. The 1.7 is really designed for a bigger guy than me. I have seen others talk about the difference between the two and I must say I agree. Warbonnet Outdoors does give good recommendations on the website with regard to the proper model for a person’s particular height and weight. Up in Wabakimi I slept with the side tie outs staked out and without them staked out. I like staking out the sides because I feel like the hammock is airier, i.e. gets better ventilation. It also seems bigger because the extra fabric at the sides doesn’t flop down over you.
08/31/2011
Q from Reader: I am 64 and having those joint issues. I hear others speak about the idea of ground sleeping becoming an issue. I have trialed my system at home and find the ALPS mountaineering pad fits well and gives support as well as warmth. Its size makes it a hassle to pack, hence dreams of an underbag someday. Any other thoughts about the pad providing support or other thoughts?
Answer - I found that using a ccf pad did provide just a bit of flatness lying flat out, and more support when I curled up on my side. The issue with a pad is to make sure you have something to wrap around the shoulders. A 20" pad just won't reach around far enough. Having tried both the pad and the underquilt, I can say the underquilt is more comfortable and easier to pack. But they are kinda $pendy.
Also, make sure that where ever you are going will have sufficient trees (BW/Q do). I was warned ahead of time that the black spruce up in Wabikimi might not work out and I did have to spend 2 nights on the ground. I had my ccf pads wrapped around the inside of a portage pack, so I was OK.One more thing:
If using a ccf pad, some folks will take a regular 20" pad and cut it so you have two sections that are 20 x 30 or one section that is 20x 36 (or some length between 30 and 36) and one section that is 20x24. The longer section is placed beneath the shoulders and the shorter beneath your rump. You also can look up Segmented Pad Extender for more tips.
10/03/2012
Q from a Reader: What’s the difference between 1.1 and 1.7 warbonnet blackbird
The difference is the weight/thickness of the material which comprises the hammock body. A 1.7 fabric is significantly heavier per square yard than a 1.1 (about 65% heavier). The experience is also different. A 1.1 stretches more than a 1.7 and I find it seems a bit more airy than the 1.7. On the other hand, the 1.7 does seem to give me a slightly flatter lay and it also seems the footbox in the 1.7 is more roomy, especially the depth of it. I don't know why that would be so, but it does feel that way to me.
...
I have a Hennessy Hex tarp that I used in Wabakimi last month. It gave more coverage than I expected and was easier to pitch than my big tarp.
 |
WBBB 1.1 Dbl with Hennessy 70D PU hex tarp
|
Thans to everyone at bwca.com and at HammockFroums.net for all your help and encouragement.
Thanks a lot for detailed rewuing and photoes.
ReplyDelete